
Bolt Action Starter Set; A Build Blog by Howard Nason

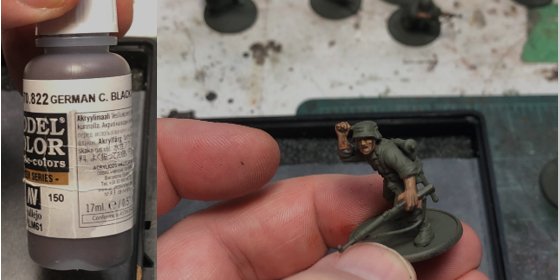
Part 4 - Painting the GermansI have to say, I always enjoy painting WWII German figures. They’re typically so different from any other nation. Most armies are pretty uniform, general issue G.I… in short, kind of dull to paint. While it’s satisfying to have a finished army, at times painting the same uniform, same webbing, same equipment over and over gets pretty tedious.The German army of WWII is an exception to this, generally. For a variety of reason, figures can be dressed and equipped radically different. The German penchant for forming Kampfgruppes is one good reason (ad hoc units that were pulled together by a commander for a task-at-hand, and then released afterwards). But Germany also equipped a huge variety of different units, each of which had distinct uniforms and often, unique equipment.On the tabletop, this means lots of variety to keep your interest up while painting as well. The army I’m collecting for myself will have Heer Grenadiers and Fallschirmjager paratroops, providing for lots of options to paint up some of the famous German “splinter” camos. But the Band of Brothers starter also gives you lots of flexibility even within the two squads. There are helmets with covers, bare helmets, helmets with chicken wire (to attach foliage to), bare heads and cloth hats. Torsos have numerous options around tunics or Zeltbahn ponchos. Finally, the weapons and equipment options are extensive, including SMG’s, rifles, MG-42’s, Panzerfausts and more.While the American paratroops look very uniform, like an army, the Germans look very personalized and have lots of flavour, and it gives you a chance to try some different camo schemes and equipment load-outs.Okay, preamble out of the way, let’s get stuck in, shall we?As before with the US, I’m going to basecoat everything with the airbrush. In this case, I’m using Vallejo German Fieldgrey 70.830, thinned down to spray through my airbrush. Brushing it on works just fine too if you don’t have an airbrush, I just like the time it saves. Use a spray booth and/or decent mask/respirator if you can.Because the Germans have so much gear that’s different colours, I’m going to start at the skin and work my way outward this time, meaning I’ll finish the skin first, then I’ll highlight the uniforms, then I’ll base coat the webbing, then equipment and highlight it all on top of the uniform, finishing with the weapons. So each layer of gear will get painted up on its own. Rather than block painting everything at once, this just helps me avoid touch-ups later, as otherwise, I’m likely to hit something with a brush and have to go back and repaint it.Faces and hands get the same treatment as the US paras.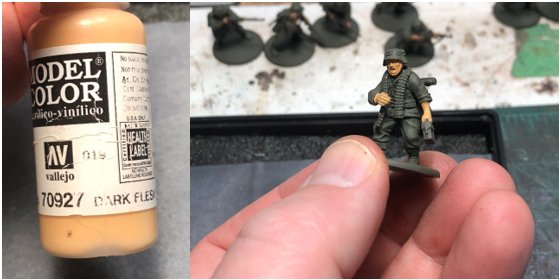
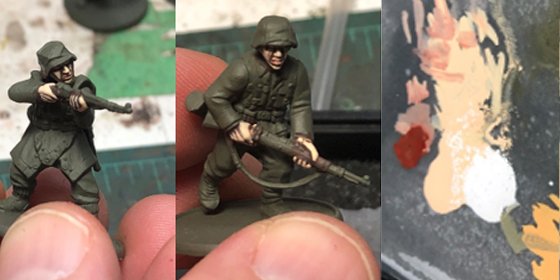 Next it’s time to highlight the uniforms. On the wet palette (also in the image above), I mix a blend of Iraqi Sand and German Fieldgrey for a much lighter version and using a size 0 or 1 brush, I follow the folds and creases sculpted on the figures, where light would catch, and I paint in some of my own just to break up large areas of the same colour. You can see below, it stands out well, and it’s a fairly stark contrast. But once again, I know the Army Painter Quickshade is going to tone it down and add depth and shadow into the real creases and folds on the model. I also paint and highlight the bread bag hanging on the back of most figures, as this was typically the same colour as the uniform.
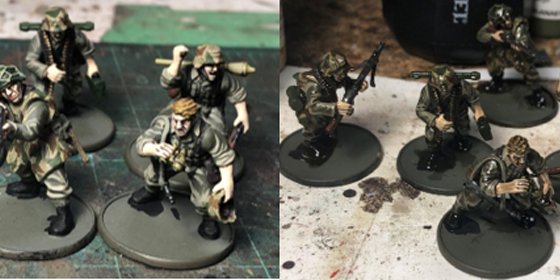
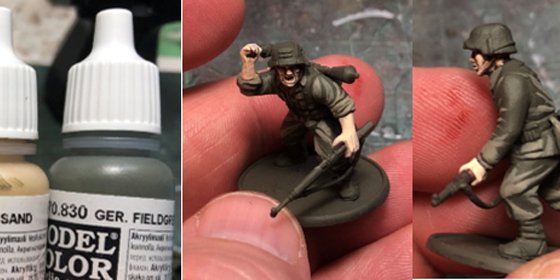 Once the fieldgrey is highlighted, I base coat the other elements I’m going to paint some camo on; any helmet covers or Zeltbahn ponchos get German Camo Beige 70.821. I used to apply a wash over the German Camo Beige colour, and you could if you like a little more contrast, but the Quickshade will give me enough shadows for what I want. Painting Splinter CamoSplinter camo refers to a number of different camo patterns produced during the war that were applied on helmet covers, Fallschirmjager jumpsuits and Zeltbahn (a one-man poncho cover that could also be zipped up with another one to create a two-man tent. Typically they were worn like a poncho, and webbing and equipment were worn overtop). Splinter is a distinct pattern that’s not too difficult to represent on the tabletop.Painting the famous German splinter camo is something I’ve tackled before in 15mm for Flames of War, so I’m going to use the same approach here, scaled up. The pattern I’m fond of uses angular shapes of green and brown, with lots of thin green lines overtop of it all. (Google it and you’ll see several different styles. I have a few reference books on German gear that show quite a variety).In practical terms, I like to let some of the beige base colour show through, to really differentiate these figures from standard fieldgrey, so my patterns aren’t as dense. I’m using Vallejo German Camo Medium Brown 70.826 and Reflective Green 70.890, which is now re-named to Refractive Green with the same number, and a slightly different hue, but still a good colour.Using a 00 brush, I paint on angular brown shapes first, and then do the same with green, allowing the green to sometimes go overtop of the brown.Next, I’m using a 000 brush and thinned down green paint to try to capture the little green lines in open areas of the beige colour, but also overtop of the brown and passing into the green. In reality these green lines were extensive, but in a small scale I just want to hint at them and not overdo it.Getting your paint thinned to flow in fine lines takes a bit of practice, so test out your paint and brush strokes first on some paper or another figure, and once you’ve got the hang of it, move to the real figure. If you botch it, just wipe it off with your finger before it’s dry, or a pointed moistened Q-tip, or just paint some beige and try again. The results are worth it, once you pull it off. Just keep that point on your brush, and draw the line so the brush is always being shaped to a point as you paint (drawing the brush backwards).
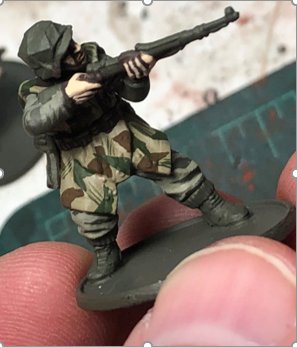 Then I was satisfied with the results it was time to start painting all the equipment hanging off the figures. This starts with the webbing, which I paint German Camo Black Brown, and I pick out any edges with a lighter tone to highlight them (mixing in Iraqi Sand usually).On top of the webbing hangs all the gear. Just about everyone has a canteen and a bread bag, and then there’s a huge variety of gas mask canisters, ammo pouches, rolled up tarps or Zeltbahn, mess tins etc.If you’ve got any reference, take a look, but here’s some pics from one of my books to show the variety seen even among canteens. So basically just pick some colours that are close, and stick with them.
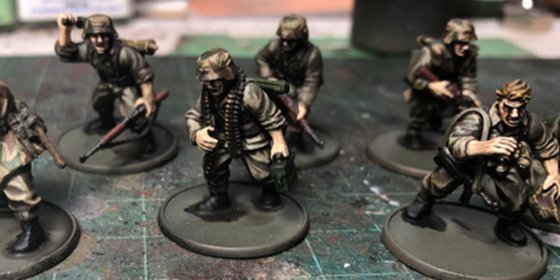
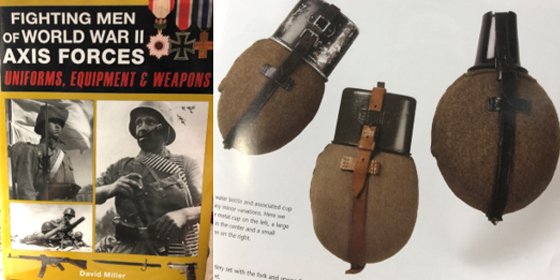 Generally, I follow a fairly established colour palette for my Germans in 15mm, and I’m using that here. Canteens are painted 70.894 Flat Brown, the cup is painted Reflective Green along with the mess tin. I might also use Russian Green some times. Tarps I pick another green that is similar, and everything is highlighted with a mix of base colour plus white or Iraqi Sand. Pretty simple.I also paint the same item on all the figures, like an assembly line. Brown goes on the canteens. While the last figures are drying, I pick up the first one and paint the mess tin green, moving down the line painting all the mess tins etc. German boots I paint black.
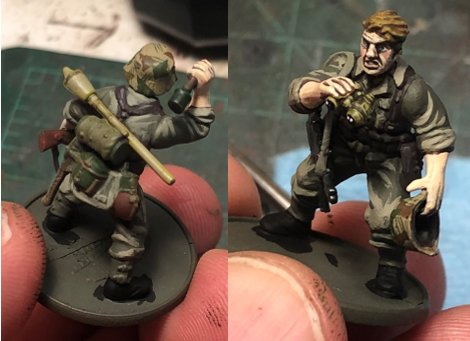 The last stage is to paint up the weapons. Again, you’ve got a huge variety of finishes to consider, and using the same David Miller reference book as above, we see several vastly different wood stocks used to produce the German Kar98 rifle. As with my US, I’m using a combination of Mahogany Brown and Burnt Umber colours to give that reddish tinge and a bit of a wood grain effect where I can.Any SMG or MG-42 gets Gunmetal Grey again, and the slings are painted a suitable khaki / grey-green colour, whatever you prefer.
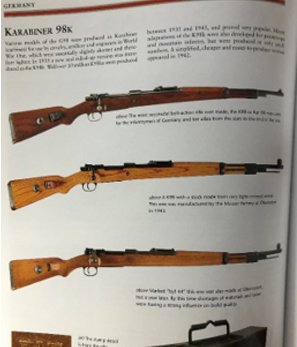 At this point, the army is pretty much finished and ready for the Army Painter Quickshade.
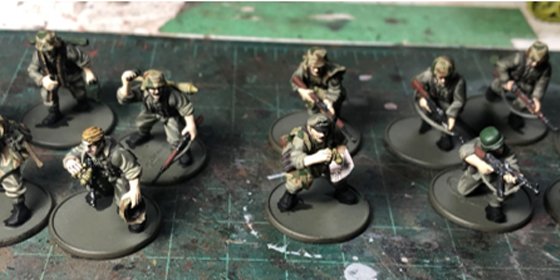
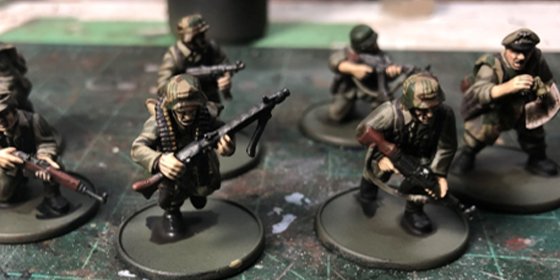
 One squad before and after Quickshade. Note the NCO figure with no helmet has fairly bright yellow hair before the dip, and it’s more natural after the Quickshade is applied. I’m counting on these kinds of final adjustments in tone from the wash.
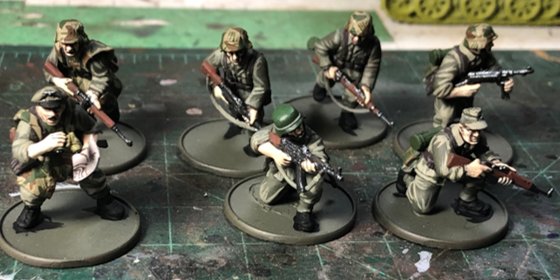 Squad two before and after. The models are so shiny, it’s hard to see what the Quickshade is actually doing.
 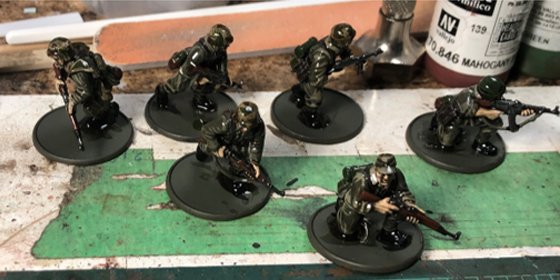 Once the dullcoat has been sprayed you can really appreciate the results of the Quickshade. In the figure below you can see the subtle shadows around the buttons on the Zeltbahn, the shading around the top of the boots, the shading around the metal on the rifle…
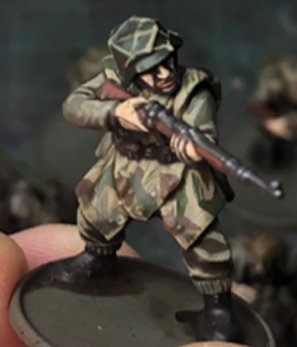
 Basing FiguresFinally, everything needs to be based. I have a simple plan in mind for this. Woodland Scenics makes a great model railroad ballast in a brown colour that’s great for gluing down to the bases. I simply apply CA glue all over the base, sink the base into the ballast, shake off the excess and let it dry. Do this where you’ve got some airflow though, as CA can be an irritant. I use a toothpick to work the liquid CA into small areas, and up against the boots etc.
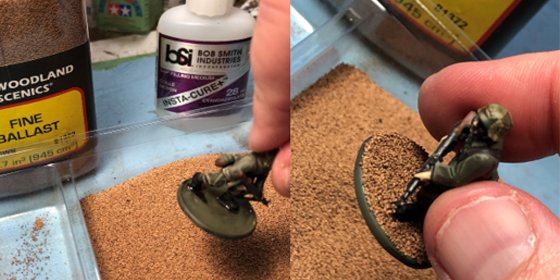 Once the base is dry, I take my German Camo Black Brown again, mix up a thicker wash that’s more paint than water, and give everything a good coating. This lets a nice deep brown colour soak into all the crevices. Once it’s dry, I give the base a light drybrush with Iraqi Sand.
 Once drybrushed, I use my preferred colour to paint the edges of the bases, which for years has been Vallejo English Uniform 70.921. I do this first, because once the static grass is glued on, you’ll never get it out of the way, and it gets stuck in the paint and looks terrible.
 At this point, I apply little patches of static grass, and then grass and bush tufts that I have. My grass is from Silflor from years ago, and I just apply it by putting normal PVA white glue onto the base, leaving some areas where the brown gravel shows through still. I like to show a little of the earth under the grass and it also gives me places to stick the tufts and bushes later.
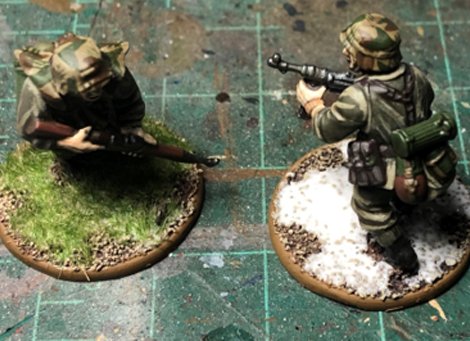 I’m going to put the grass tufts on one squad and the little bushes on the other squad, so it’s one more visual cue how to organize the squads on the tabletop since this will be a store army for new players. But this is a good idea I find in general. Put a bit of thought into how you’ll tell your squads apart on the tabletop since you don’t want to be picking up and moving figures during a game. You can use different flowers on the bases, markings on the edge of the bases, different colour codes around the edges of the bases, maybe some bases are grass and some are rubble and so on.I had grand plans of a special base for my LMG team, but realized at this point I’d glued the two prone figures down in the wrong spot. Whoops! So there’s not quite enough room for the 3rd figure. I’ll make a little slot for it on the side of the large base, and probably cover up with some bushes so it all fits better.
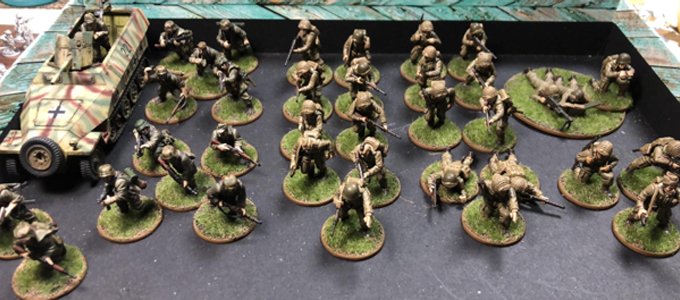 Next up: Painting the German Sd Kfz 251 half track!