
Sump Sea Board and Accoutrements - Part Two: Giant Sized Explanation of Idea and Execution of Similar...
I've just finished the Sump Sea board that I've been working on for the past couple months and rather than sit around patting myself on the back I thought I'd write an article as well. This build ended up taking a lot longer than I had first planned but I'm excited for a unique gaming setting that promises to see many sticky deaths for those poor gangers! Here is how, and why.
“Work with what you got”, said someone, once. Here I am using the reverse side of a pre-existing gaming table, built but never finished, years ago The other side is the (oft photoed) Crater Board. Strangely the whole table is a mistake from start to finish...but it will end up working out perfectly for my purposes here. The table had been constructed for a different game originally but was always designed to be double sided...and in the end it will end up being my Double Sided Necromunda board. Everything works out eventually.

The fabulous 'Other Side', used in many a space battle game and current Sector Mechanicus darling.
The side in question is recessed 4 inches from the top edge of the board edge, this was then built up with 3 levels of 1” Styrofoam around the middle, each piece of styro was cut thinner than the last. My original plan was to build a pyramid, with a removable top...but I assembled the board walls incorrectly which lead to an unsquare table. You will be forgiven for not understanding the delicate art of pyramid building...I'll just keep it simple by saying that the best I was going to get from this point on was a Ziggurut. Anyway, the project was abandoned at this stage, leaving a raised foam square, hollow in the middle and stepped against the table sides.
As the end goal of any Necromunda scenery project should involve some sort of vertical height, I always wanted the Sump section of the board to be recessed, thus adding height around the sides, once the empty space created by the pyramid steps could be closed. Edging plates were created (see a couple articles ago...) and cast to fill this purpose. It also occurred to me at this stage that lighting the underside might look cool and be done relatively cheaply and easily.
I love this under lighting, and I got to use more of my Dark Uprising bits. Gang violence never looked better.
The project became two projects at this point, which was a good thing as the 'unfun' project could be broken up by working on the 'fun' project. The 'fun' project involved a good raid of the bits box and sticking science fictiony stuff all over the interior of the wall sections. The 'unfun' was painting lots and lots of side plates and fiddling with lighting and wiring...
Both were finished around the same time but let's explain one and then the other. The 'unfun' suffered from repetition of form: cast plates, paint plates, fit plates. In the end I decided to cut several MDF spacers to break up the look of all the plates and I'm glad that I did. The lesson here, for me at least, was; don't be afraid to change your build to accommodate your time frame and sanity.
The lighting was a snap. As luck would have it, the battery pack I got fit perfectly in the space between plate and foam and the lighting is just a strip of led lights. I set eye hooks, two per side, under the top plates, into the foam, ran the led strip and left one plate removable and magnetized so I can change the batteries. The lighting ended up being the easiest thing in the world...I may start lighting everything now I know how simple it is!
It looks like some excellent planning went into these walls...but it didn't. Just chance that I noticed the old Bulkheads fit perfectly...
As often happens, actual reality does not match the version of reality that is in my head. True here as the lights were too bright and obviously visible through the spaces in the top plates. I ransacked the spare plasticard bin and found enough translucent sheeting to cover the undersides of the top plates before gluing them down permanently, this had the effect of diffusing the light perfectly...if again, a bit repetitiously...
Several minor jobs remained before I was ready to say the board exterior was complete. Painting was the real job here. I had a large square, basically the same all around. I broke up the surface all I could with the plates and MDF spacers but it still looked a bit too symmetrical, and not jumbled up enough, for me. I decided on lots of decals, colour patches, and lots of rusting effects both to add to the eclectic feel but also to thematically join it all together. Also, I am well into danger stripes on everything at this point, and added some chevron patterns as well, just to switch it up a bit.
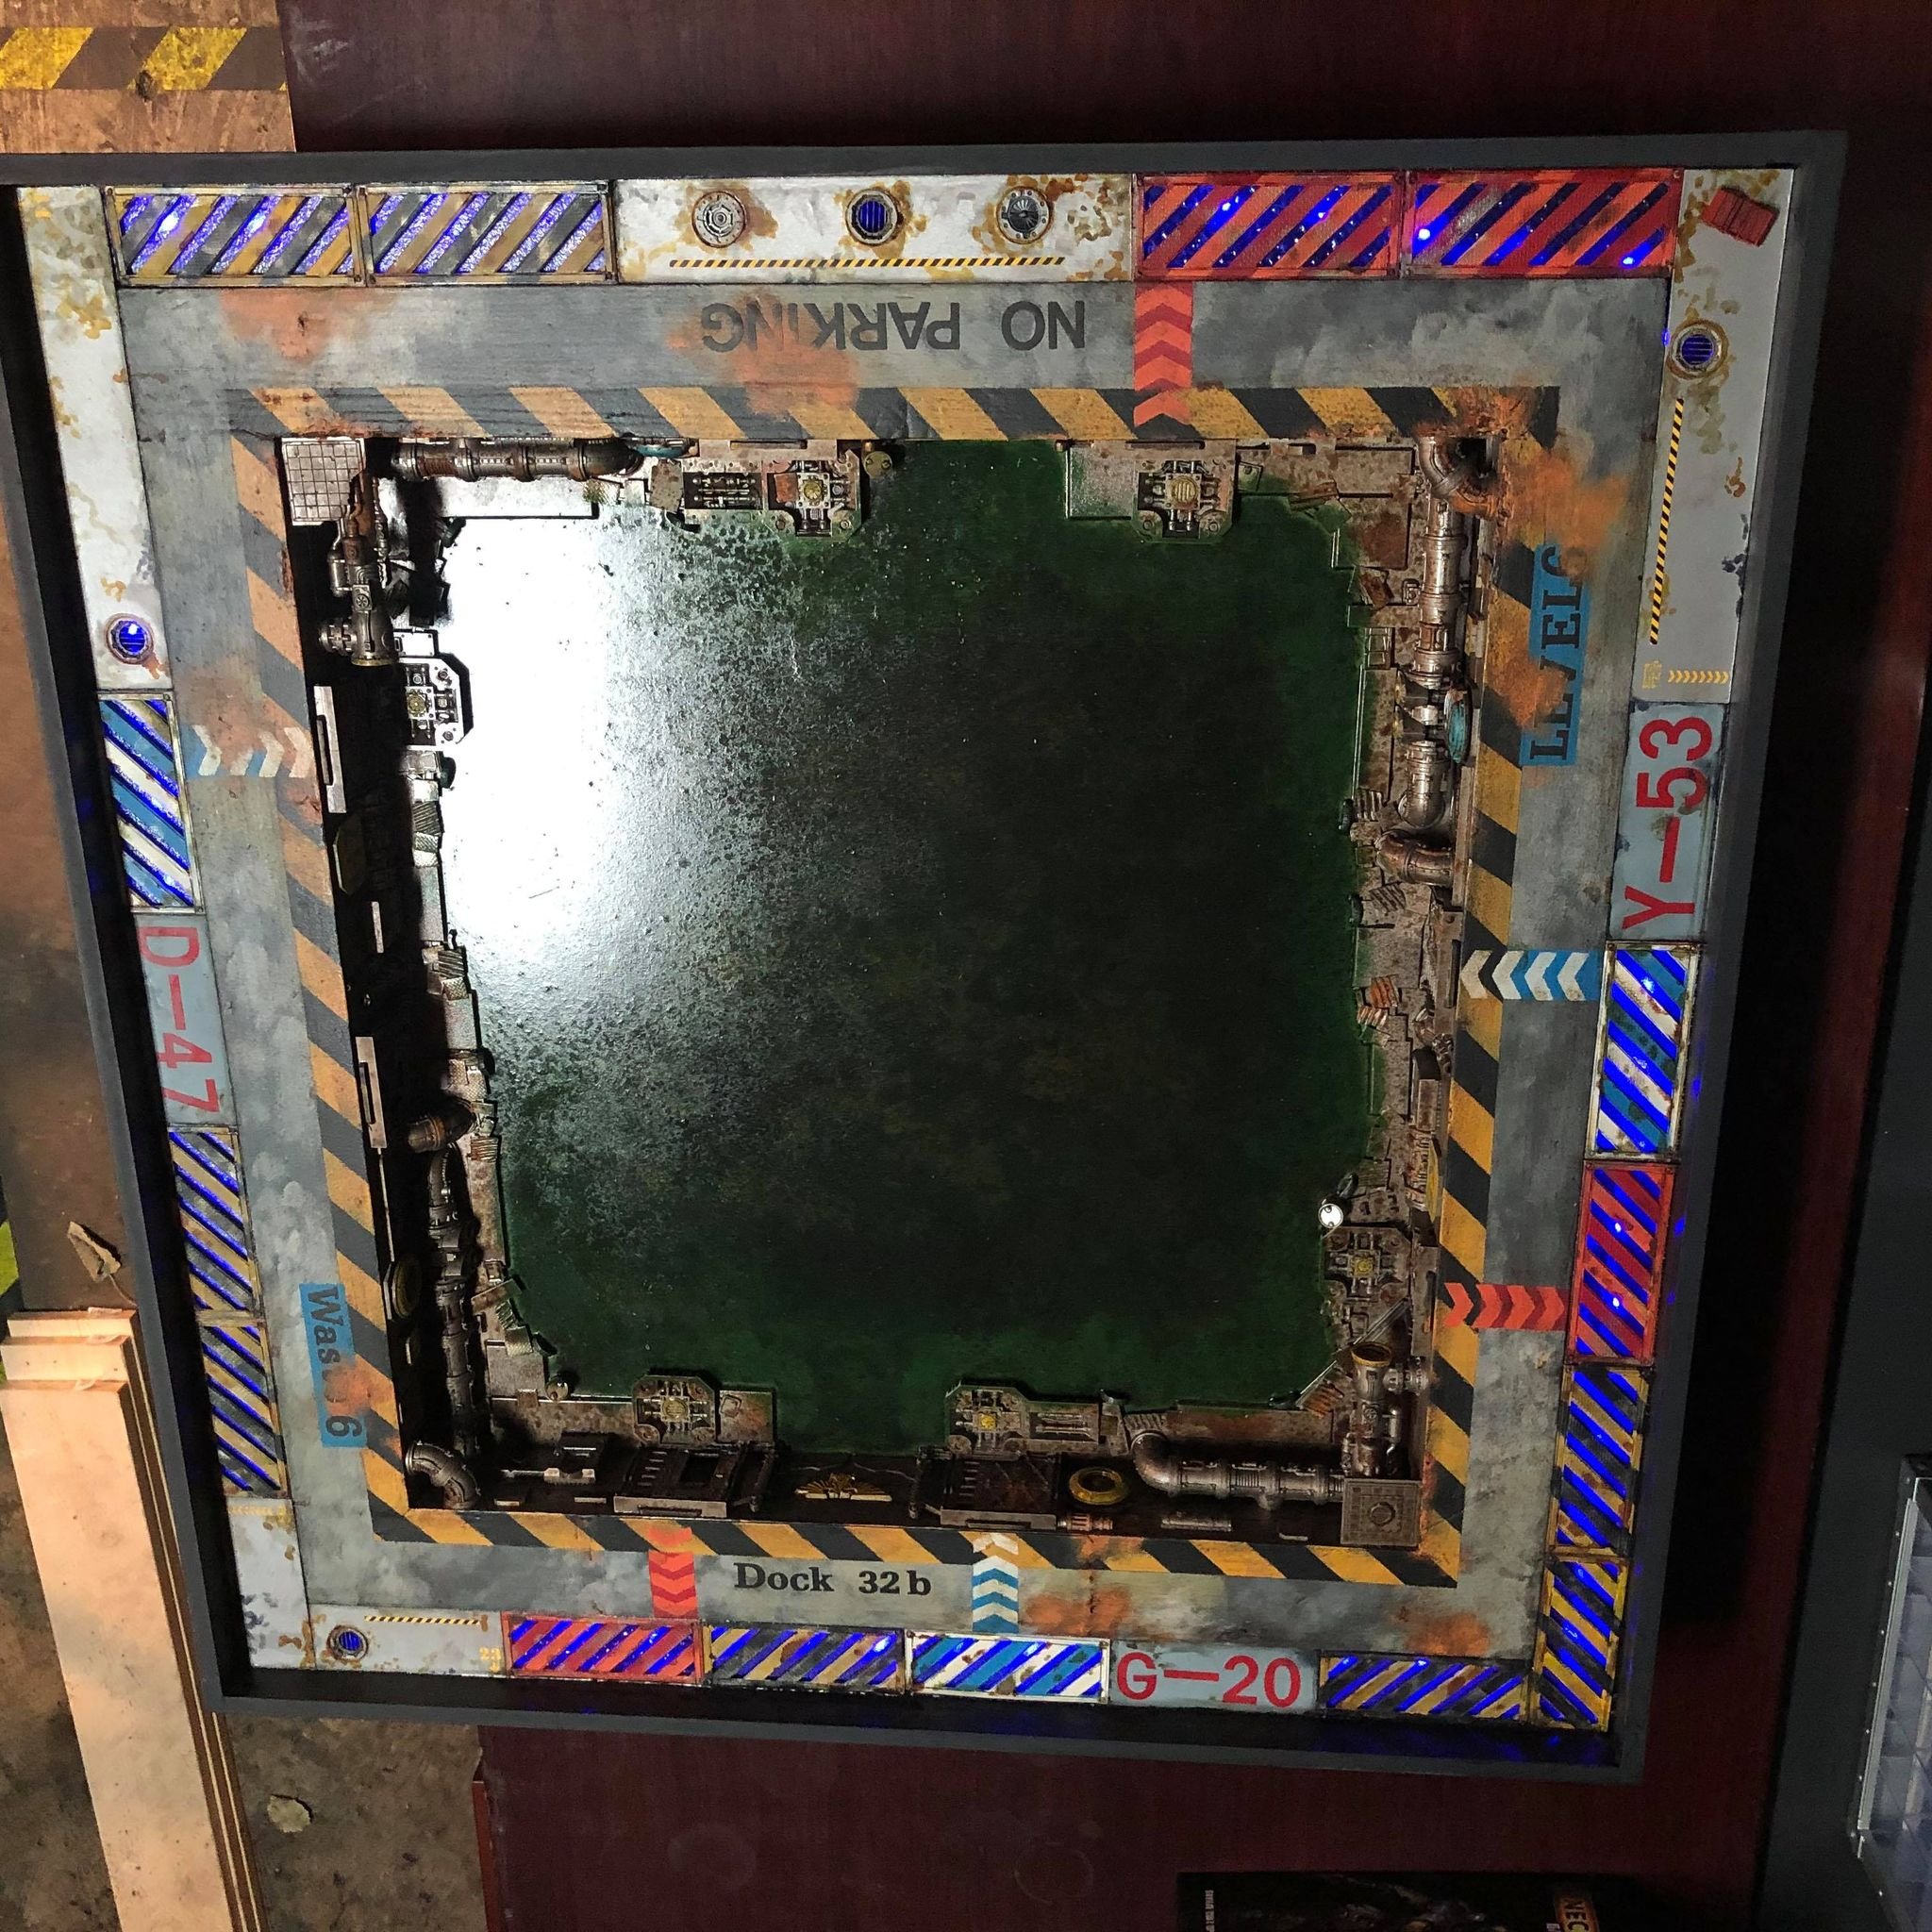
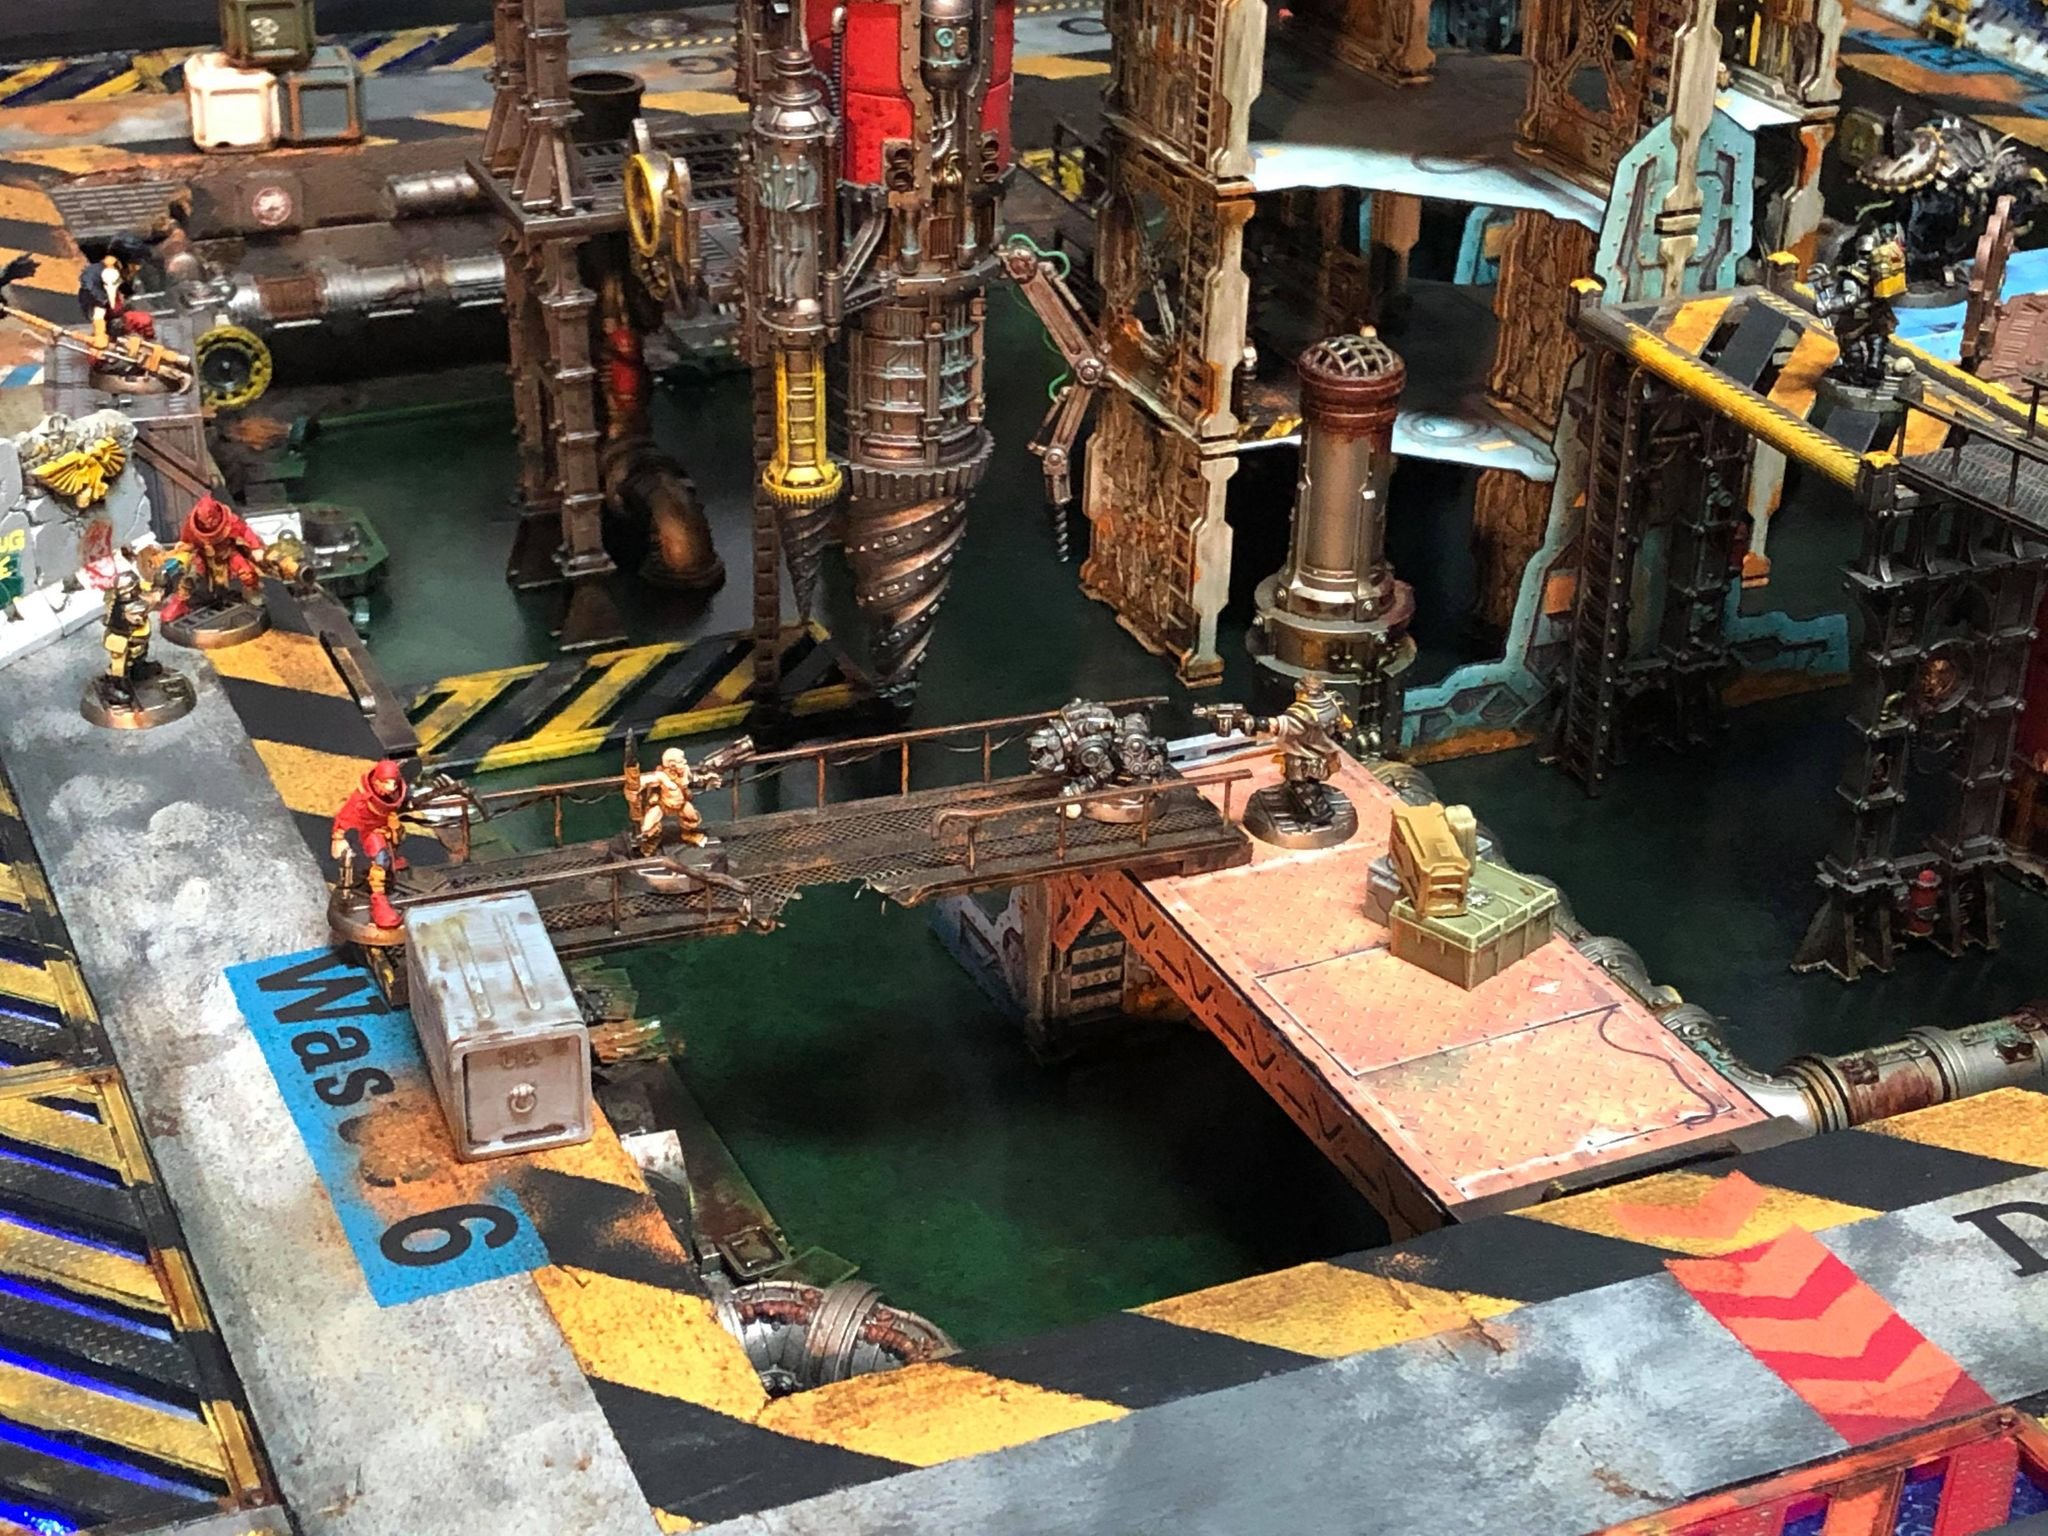
The full Sump Sea board, ready for some scenery...and horrifying drowning fatalities!
Once the exterior ledge was painted I turned on the lights...and saw lots of light bleeding through the spaces between plates. I guess the board is even less square than I imagined. Born out of a need to be finished as fast as possible and a desire to use whatever came to hand, I ended up discovering a new tool that I will now keep in my repertoire. I added 3/4 a can of Nuln Oil shade to a mostly full tube of tacky glue, shook and voila! Instant grimdark filler for unsightly model spaces and more importantly, no light anymore! And with that I say goodbye to the board sides, a project that tested my patience but one I'm fairly happy with, in the end.
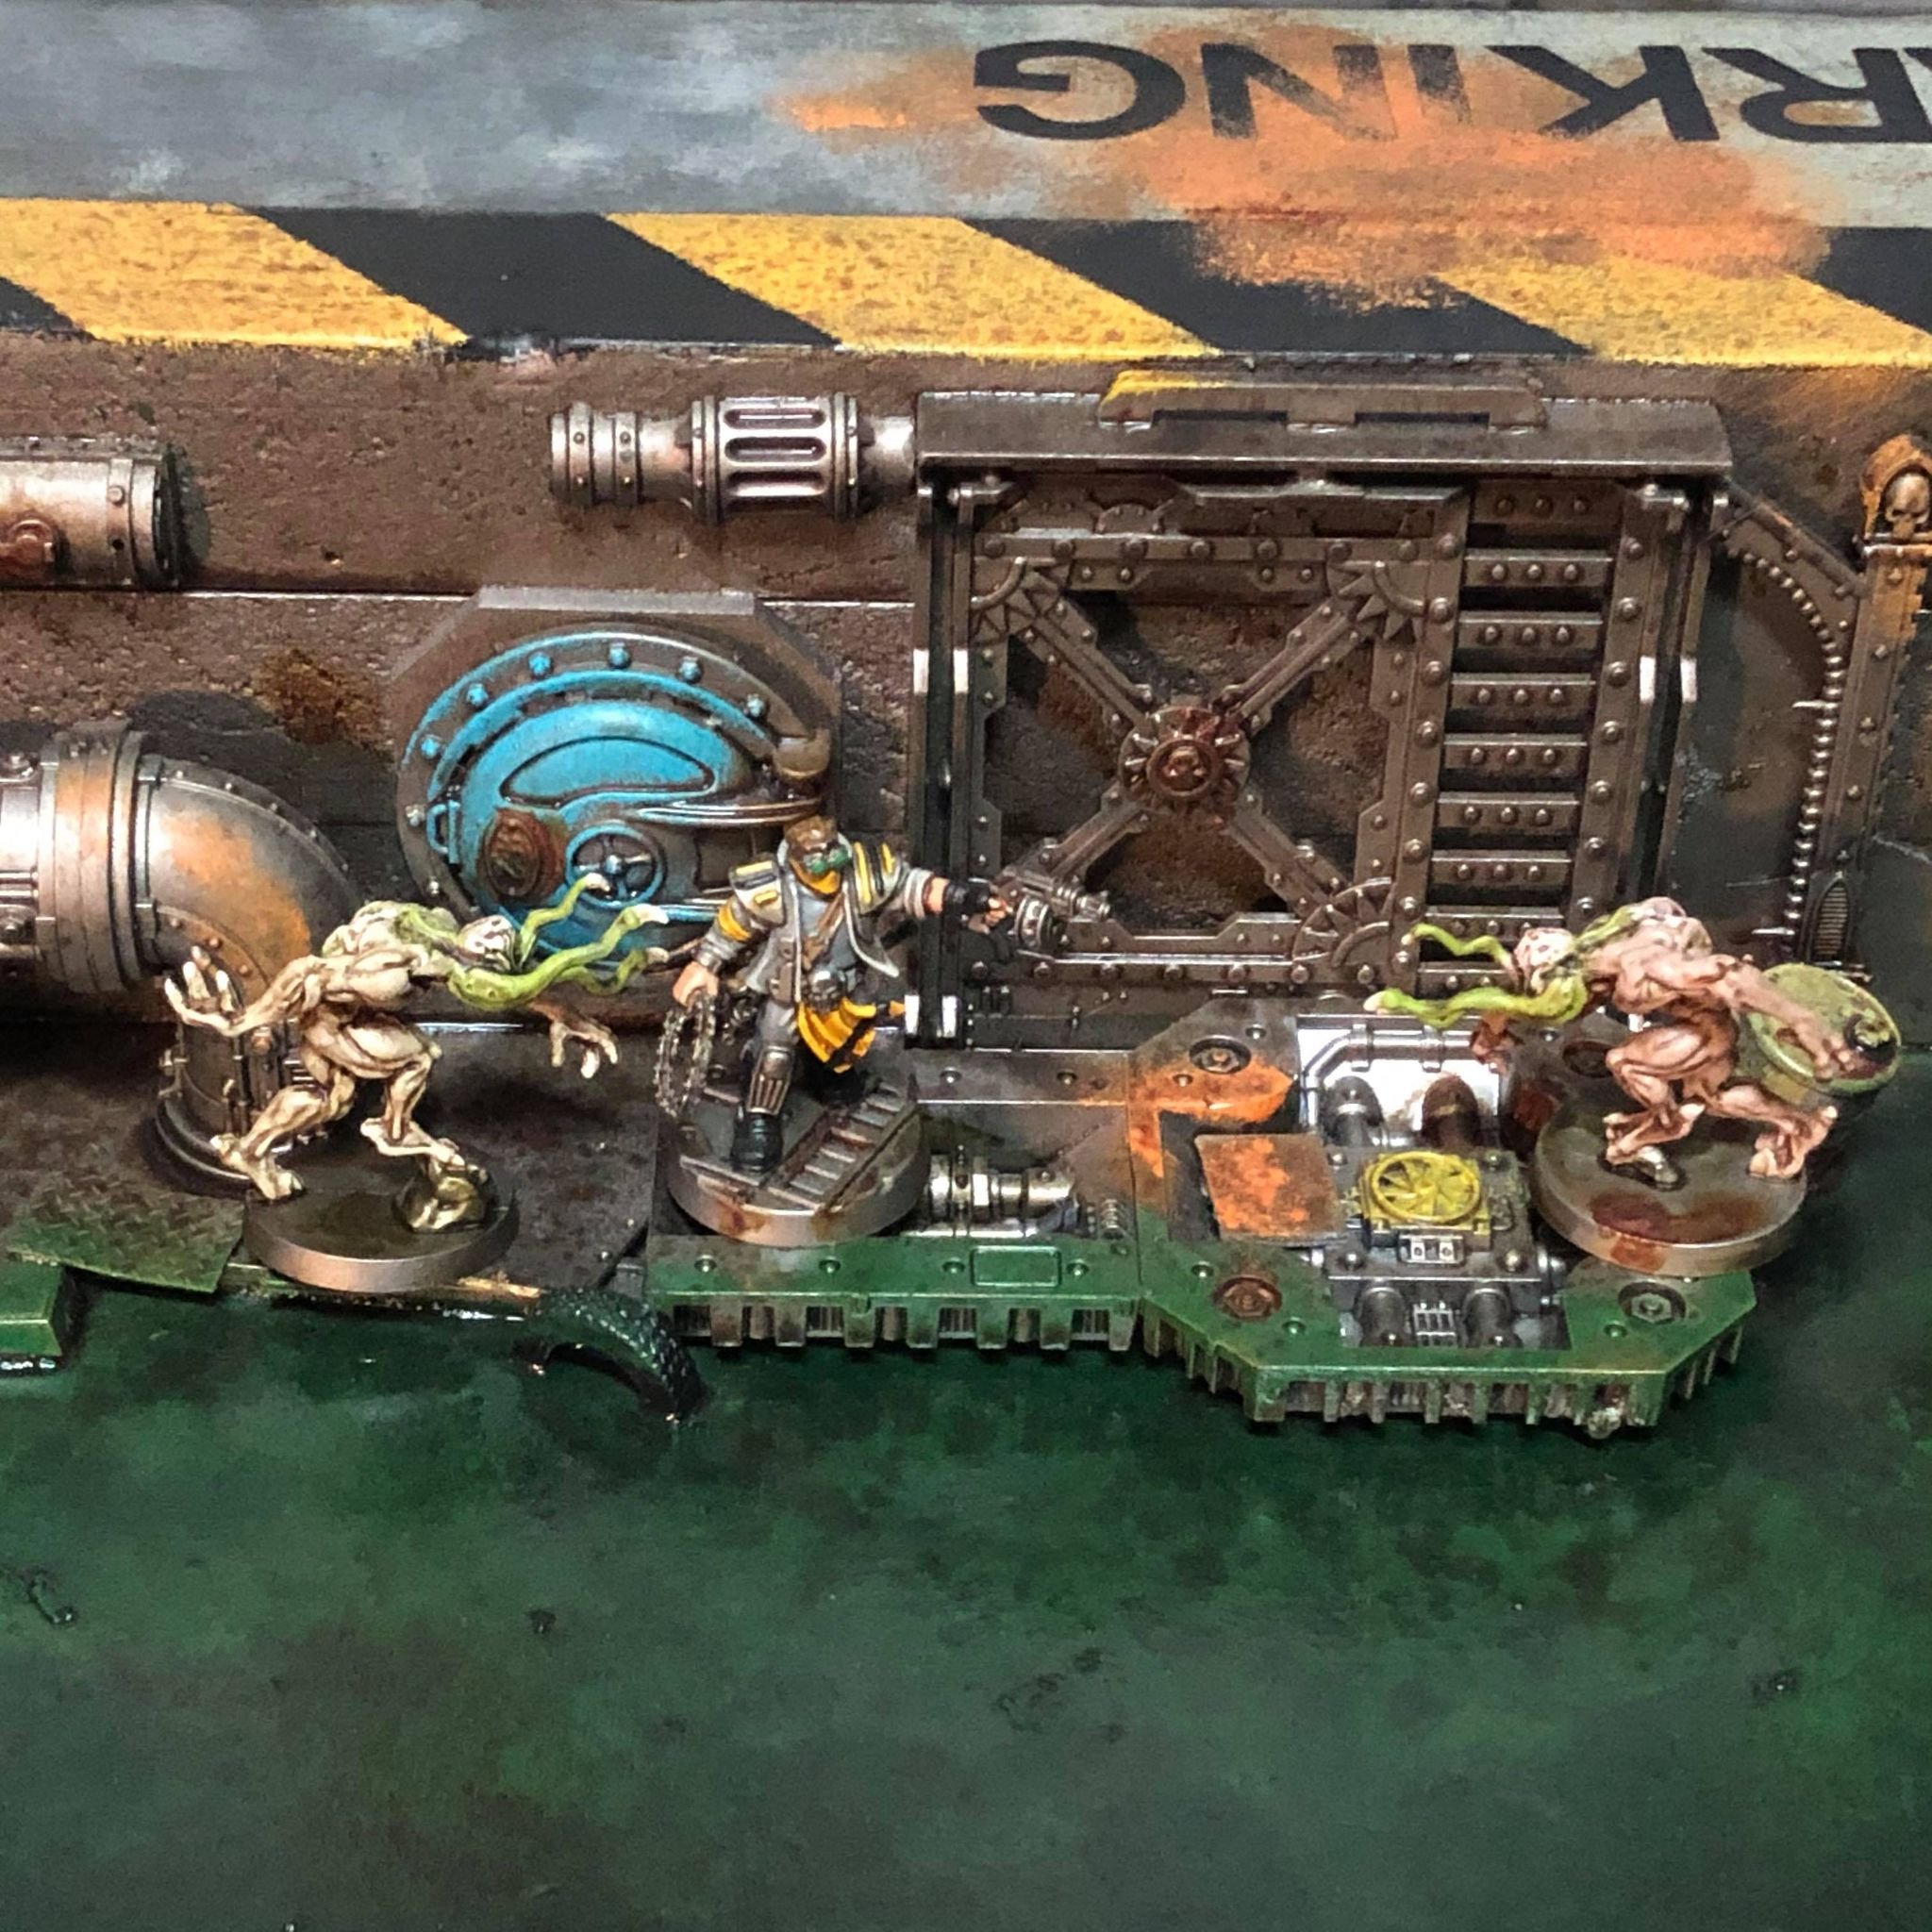
Next, or rather: at the same time...I got going on the interior, which was a much more enjoyable project. The board interior is a self contained room, with no floor. The easiest thing was to simply get the walls covered with anything that fit the theme. I'm not shy when using up old parts and went to town here. Old bulkheads, more than a few pipes and as much 'official' Necromunda stuff as I had, all helped out as well as quite a lot of leftover MDF off-cuts that I'd saved from various kits.
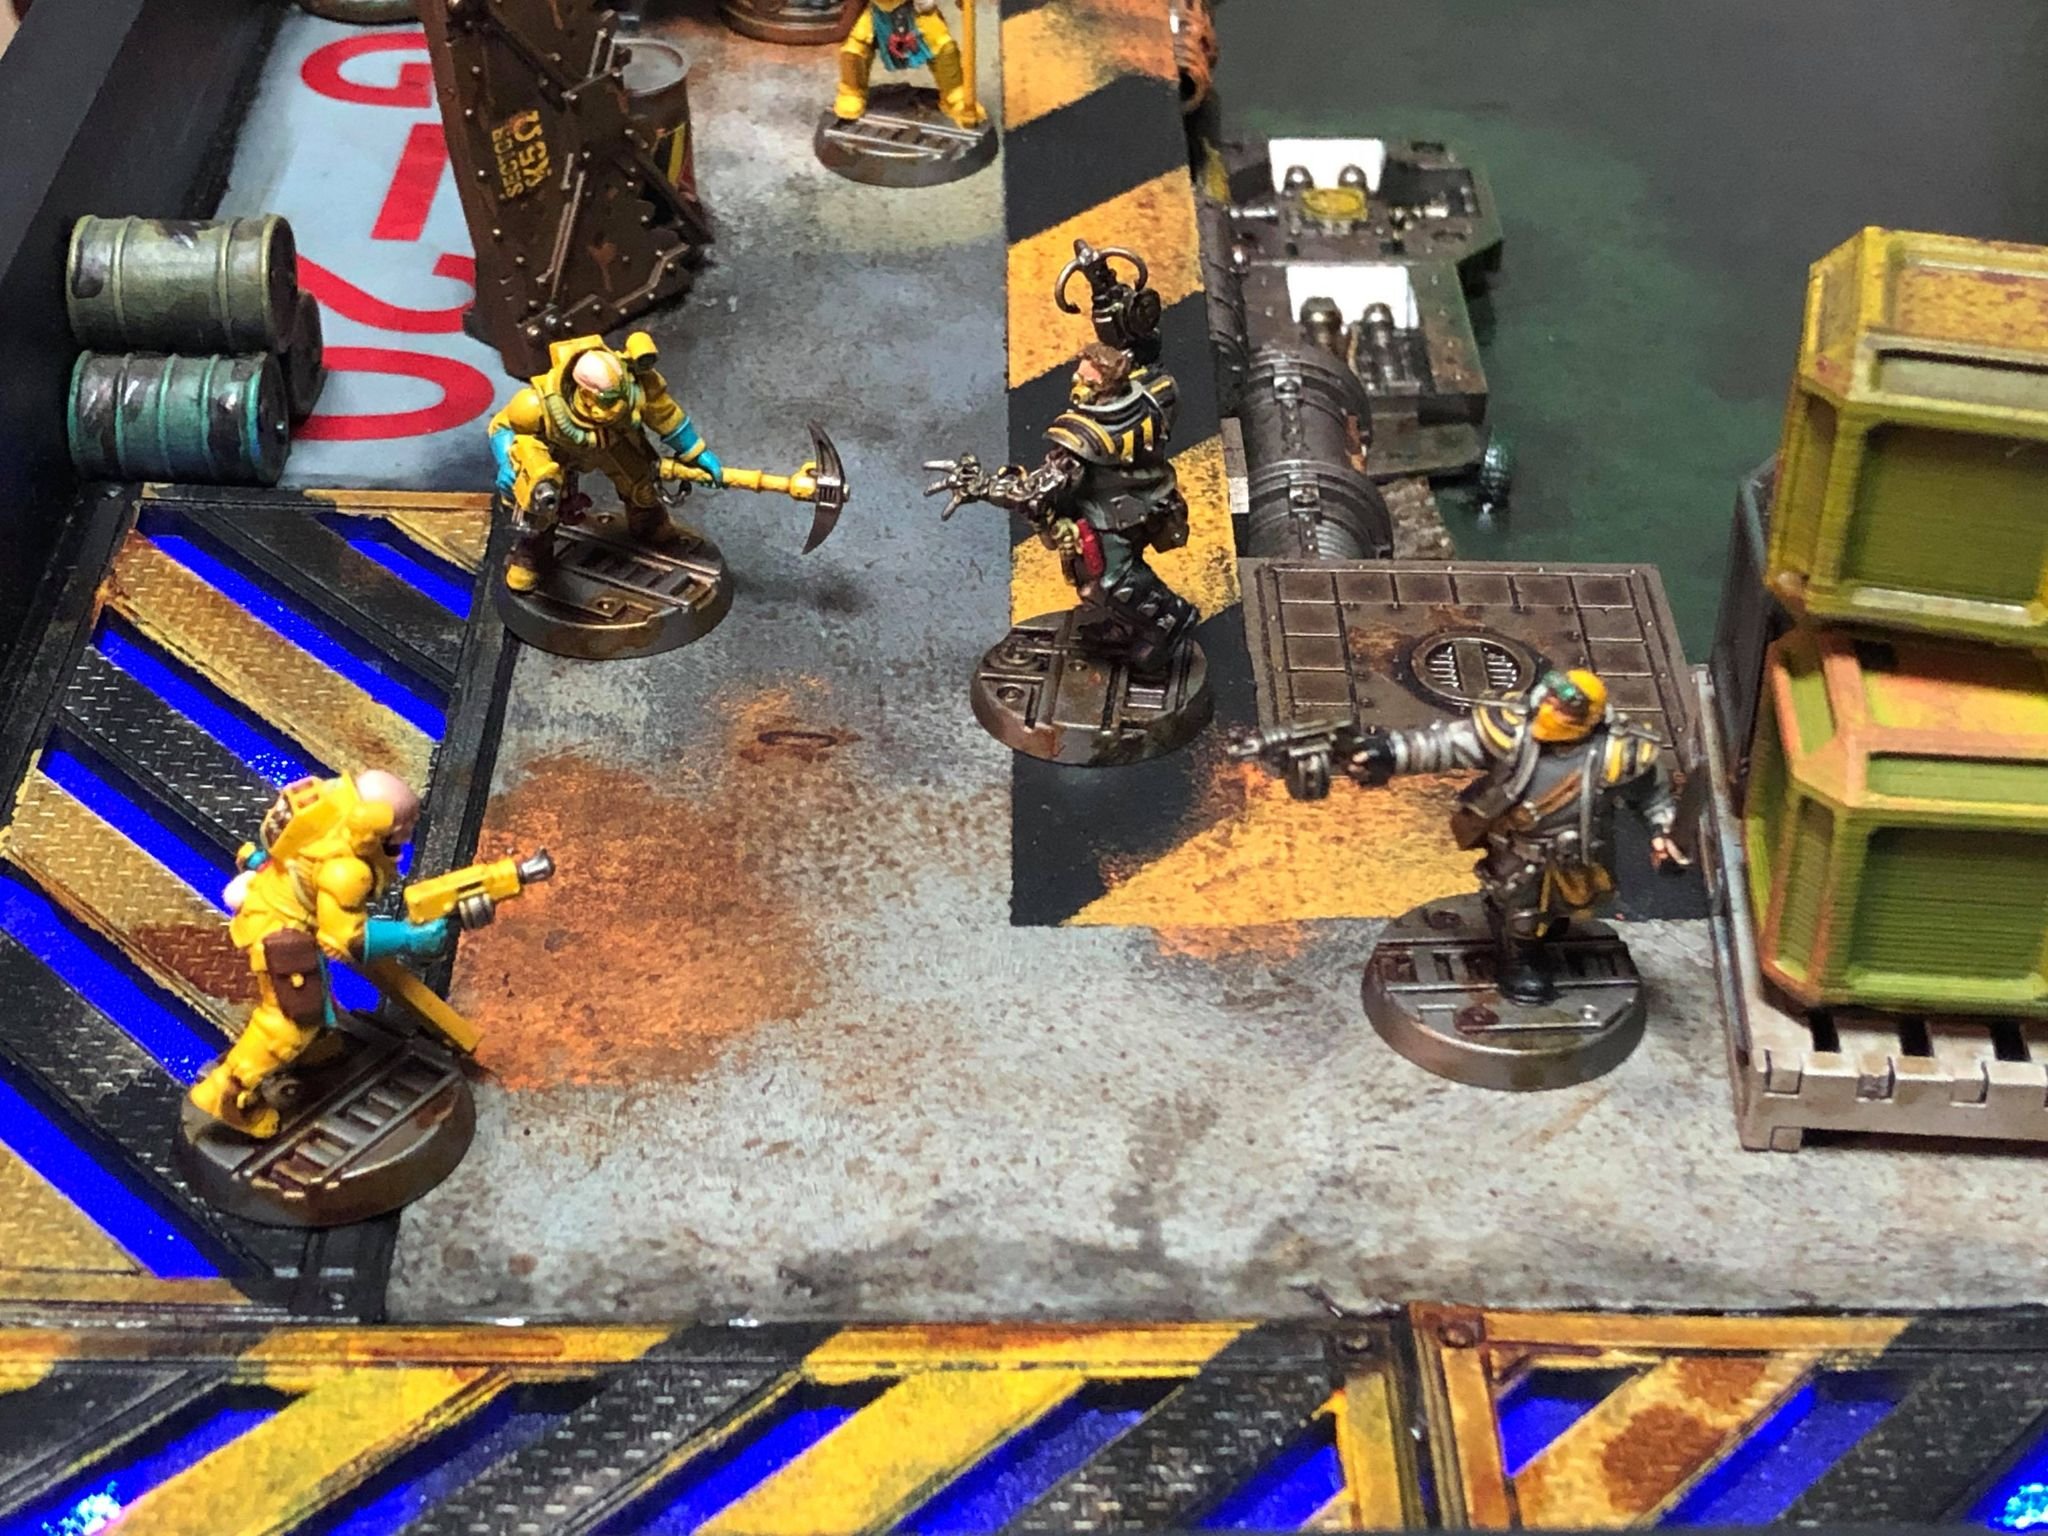
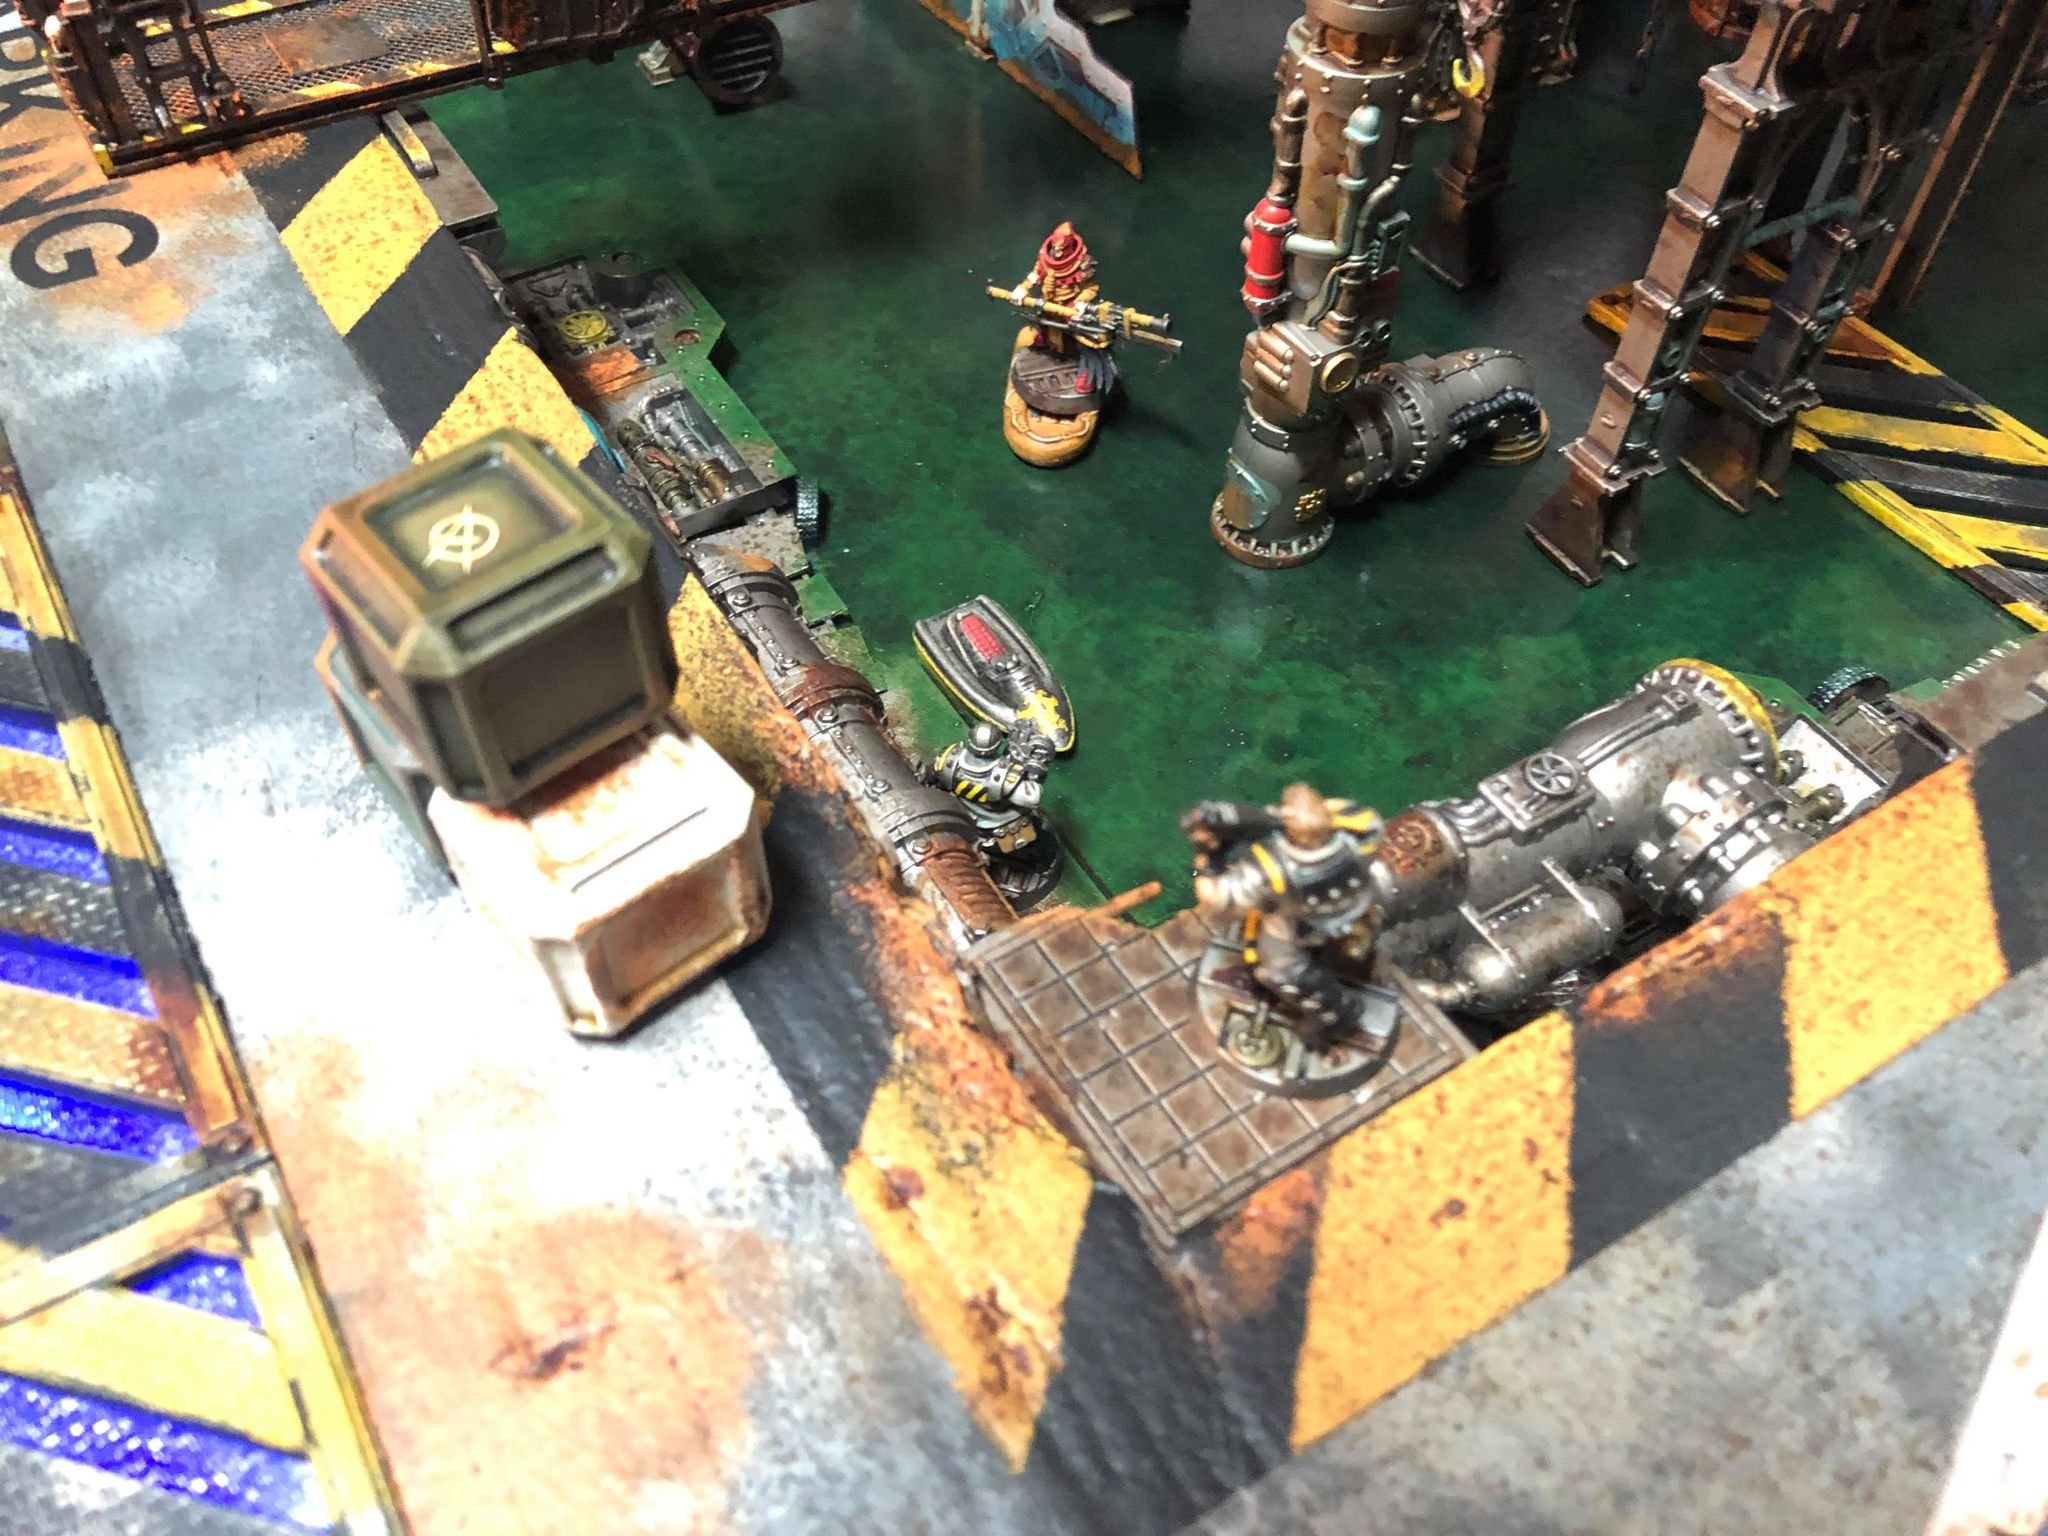
Watch yourself Sumpside, the plating is slippery! Admittedly this is a pretty tiny ledge...with no guardrail...by design.
Once the walls had a good coating of bits and pieces I started to notice that the sump floor was very boring and didn't really look all that convincing. Which was unfortunate as I had already labelled this part as the 'fun' project...more to do it seems...
Back at the ol' bits box things were looking pretty picked over from the last several Necromunda projects and I didn't have much in the way of flooring or grating or really anything that was populous enough to cover a board surface this large.,..but I knew now that the table needed yet another walkway / level around the sump edge.
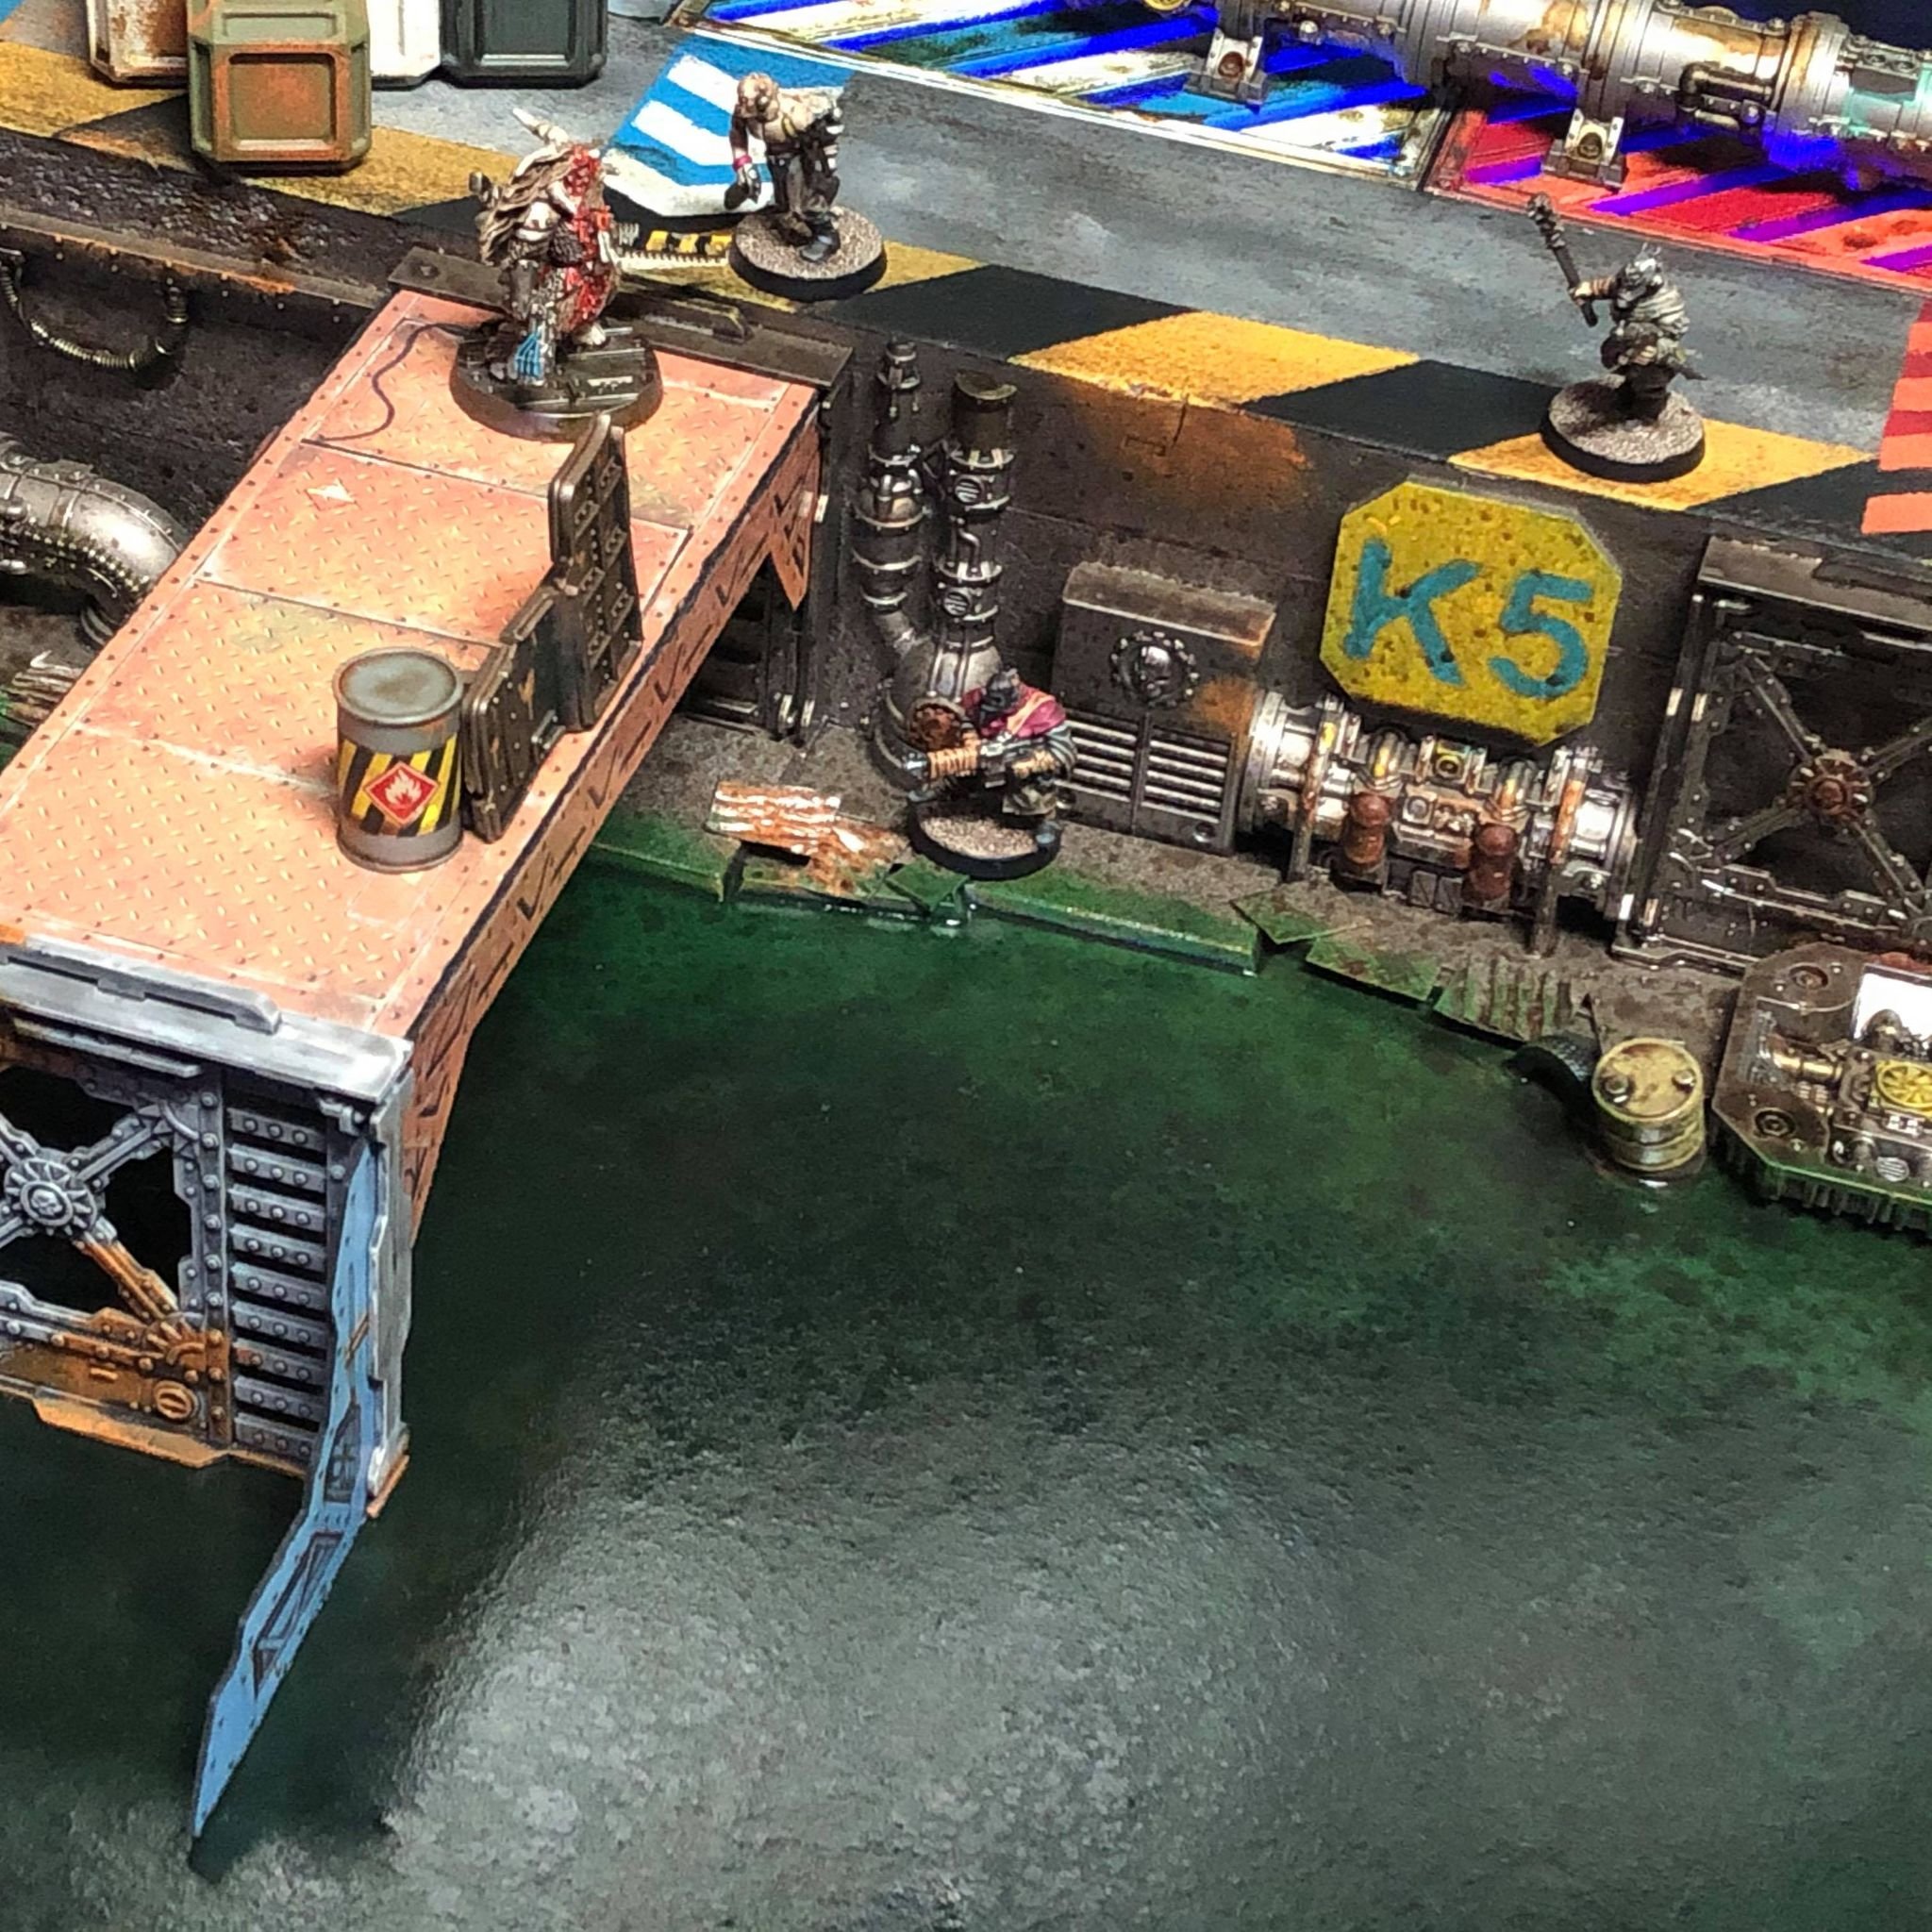
I raided the Dark Uprising box for some top plate pieces, which are super detailed, and a good start, but in no way enough to go around. Getting a bit frantic for materials I happened on a box full of old GW bases. Squares, rectangles...bigger squares. Perfect. These serve no purpose in my life and are nice and flat, which is great for a walkway. I tried to make it not look like a bunch of bases stuck side by side and I think I'll call it a success. The surface was broken up by the Dark Uprising bits and the multiple sizes of bases really added to the eclectic look. Just for a bit more visual interest I added some plasticard and corrugated cardboard plating. Finally, for the watery look, some barrels and tires were liberally scattered about the edge. These were sanded at odd angles and cut in half to make them seem to be “in water”.
A lot of work just to see little model men fall off buildings into toxic goo, but well worth it, in my opinion!
The painting was fairly straight forward. I try for somewhere between 85 – 100% finished, I can always go back later and do little things like screens and wiring. This board is around 85%...there are simply too many little bits to do in one go. The general paint job then: The sides were sprayed silver, rusted and given a couple coats of general grime wash to dull them down. A few interest areas were sponged yellow and then onto the sump itself.
Usually when I make a board I can't stop myself from adding too much detail...especially to parts that I plan on putting other scenery on. Not this time! I have resisted the urge fore needless bubbles, tentacles and other floating detritus and instead tried to do my best on a flat surface. I wanted the sump to look like chemical goo and so, went with green. Paint was applied with a sponge and the whole area given an even coat of the darkest shade that I was going to use. From there I did several more coats, each time adding in more green and yellow and focusing on the edge, shortening the painting area with each pass.
The entire board was sealed with a dull coat and then the sump itself was given a couple washes with a mixture of Pledge Floor Gloss and a bit of ink. This adds the feel of depth, makes the sump look wet and provides (when totally dry...) an excellent candy coating, which is good as the board will see lots of stacked scenery.
Little boats are a bunch of fun to push around...will need some bigger ones. Bath toys beware!!!
The edges of the table will be painted black and given a good going over with some hockey tape, which provides grip when moving / flipping and some strength and needed durability. Looking back I'm happy that it worked out and looks cool. If I had a niggle though, it is that the interior gets no light. It wouldn't be that hard to drill a few holes and run the existing light string through...I think I'll get a few games in first, see if it bugs me enough...
So ends the largest project that I've done in some time. Definitely the only table that I've done in the last several years. Projects like this are fun, if a bit all-consuming at times, and are a great way to stay hobbying, especially if you aren't getting in as many games as you'd like at the moment. Now that I have enough boards for my amusement I suppose smaller scenery and new models will be keeping me busy over the coming winter months. Who knows what I'll be bashing away on next time...pretty sure there will be at least one boat though...
-Uncle Mike